# xCRUD Pro 1.0 Guide
# xCRUD Pro 1.0 Guide
The main goal of xCRUD Pro 1.0 is to reduce the development time while providing a cutting edge robust solution.
xCRUD Pro 1.0 utilizes xCRUD 1.7 library in its framework.
xCRUD Pro has the following modules
- Authentication Module
- User/Role Configuration Module
- Role/Menu Configuration Module
- xCRUD 1.7
All xCRUD 1.7 features are incorporated into xCRUD Pro. It has Full Bootstrap UI Theme integration.
With xCRUD Pro, you are left dealing with xCRUD pages & business logic only.
If you have an existing xCRUD 1.7 application, you can easily migrate it to the new xCRUD Pro.
# xCRUD Pro Install Guide
Working on this.
# Before Usage
Before usage the following items have to be configured
- User is created in the system and given a password.
- A role is created in the system.
- A menu tree is created for the role.
- User is allocated a role.
- User can now login, select the allocated role and proceed to main page. User will only see the menu items that belong to the selected role.
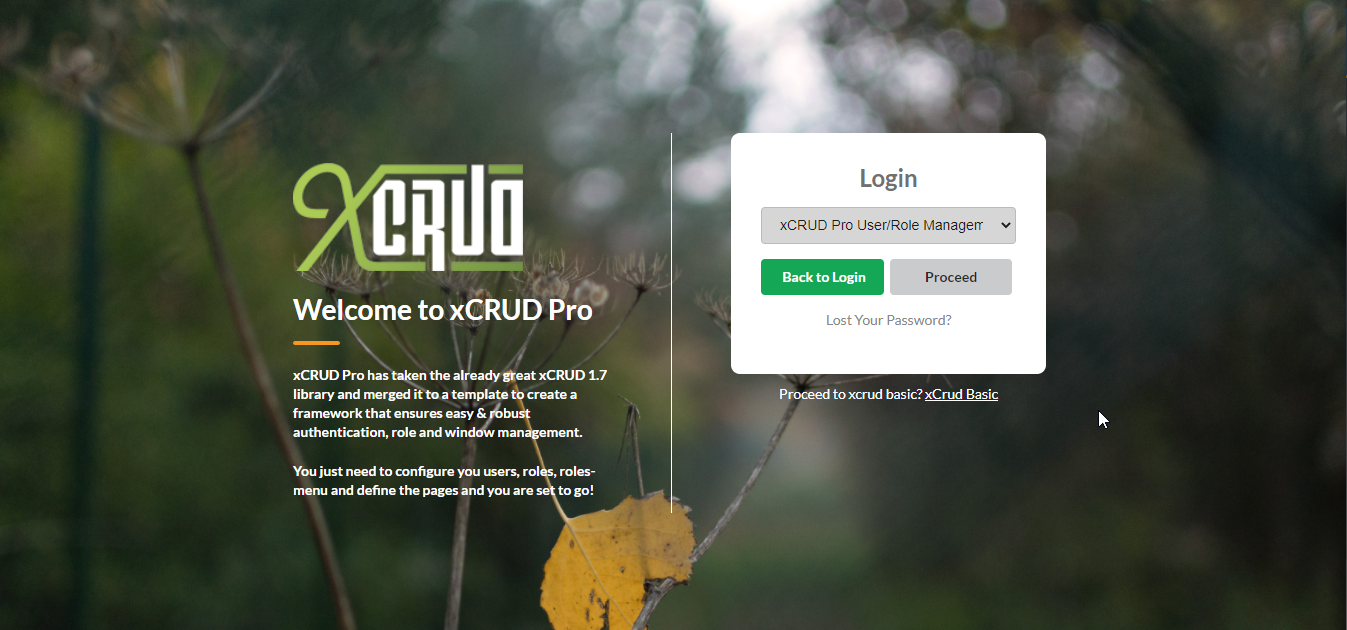
# Authentication Module
In most cases, solutions require an authentication feature to allow users access to the system. xCRUD Pro provides a login form, launched on application access, that authenticates users against user records in the database.
Upon successful login, the user is directed to choose a role and after clicking Proceed, he is redirected to the main application landing page which for our instance is the dashboard.
# Create User
xCRUD user has a superuser account which is used to configure the rest of the accounts. The superuser account by default has the following credentials. Deletion for this account is disabled.
- username: admin
- password: abc123
IMPORTANT
Change this password before deploying onto the production environment.
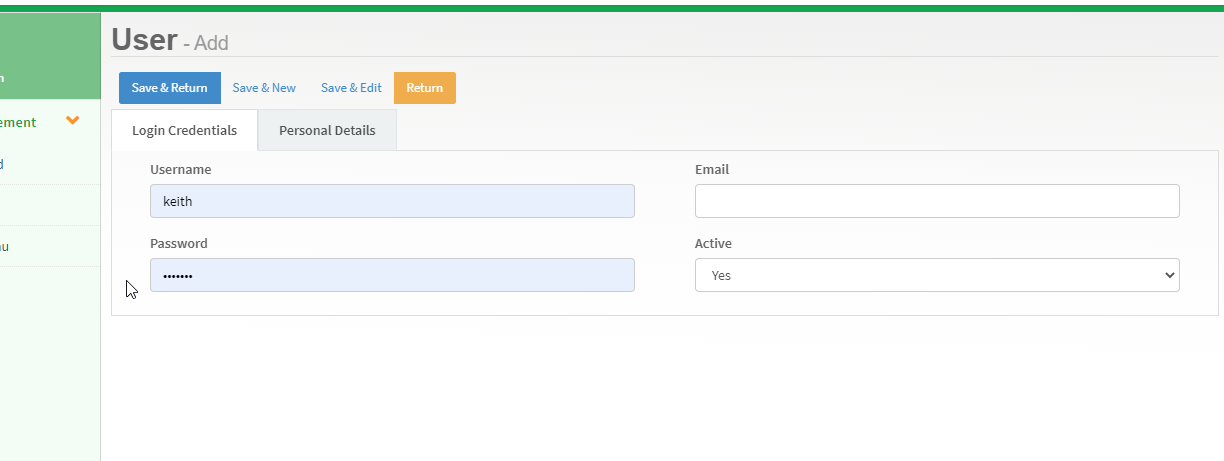
To add a new user, do the following
- Login as admin.
- On the Role window choose the role xCRUD Pro User/Role Management.
- Navigate to User/Role on the left menu
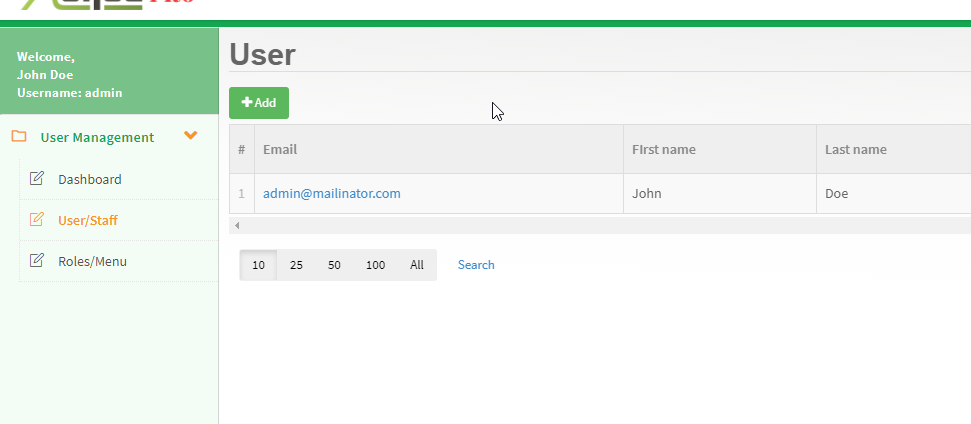
- Click Add User and a form to add user will appear.
- Add user details and save.
# User/Role Configuration Module
# Create role in the system
To create a role in the system after login, navigate to the menu on the left and click Menu/Role. Then click Add.
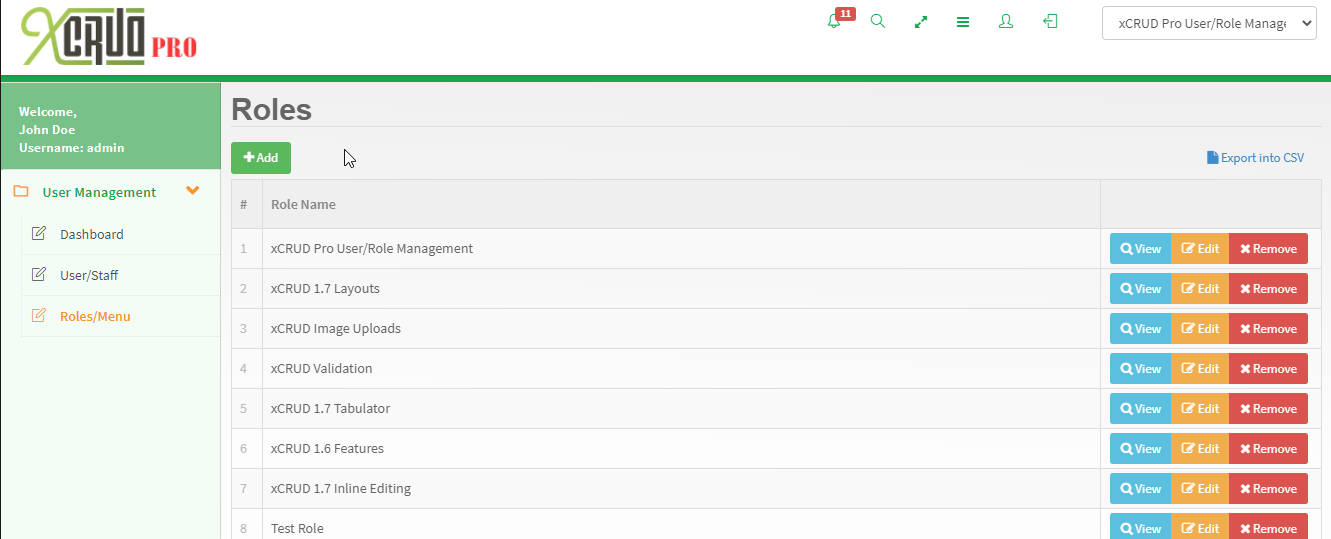
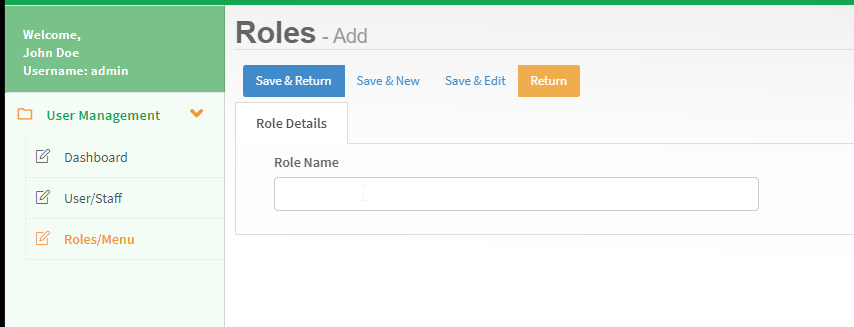
After adding and clicking Save & Edit, a new tab for adding menu items will appear on the window.
# Role/Menu Configuration Module
# Create menu tree
Navigate to the menu item Role/Menu and a list of all roles will appear.
- Click Edit against the role you wish to add the menu item.
- Then click the tab Menu and you will see the option to click Add for adding a new menu item.
- When you click Add, a form to enter a menu item will appear.
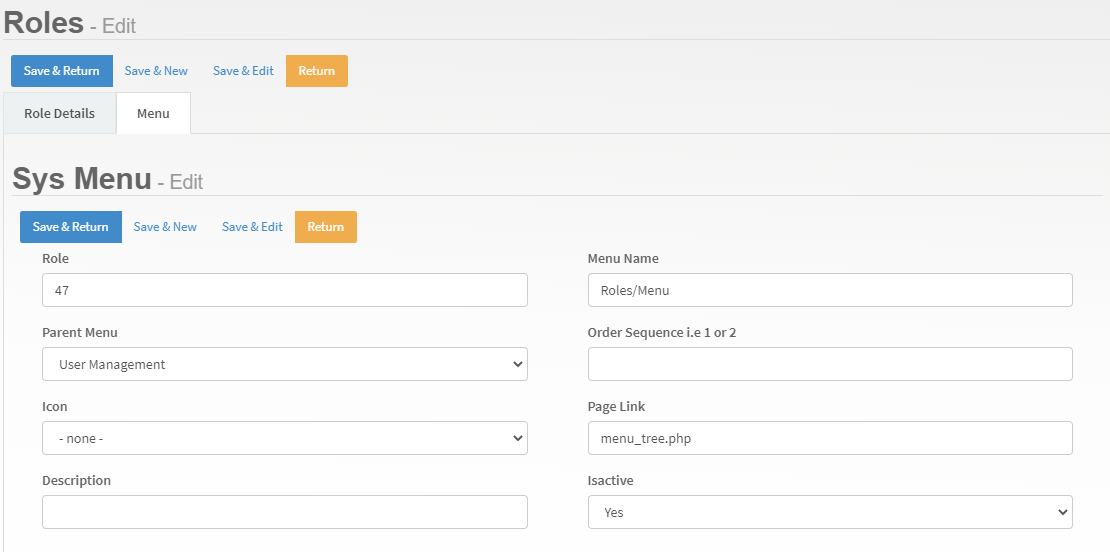
# Menu form fields
| Menu Item | Description |
|---|---|
| Role | Not editable. |
| Menu Name | The menu name that appears on the menu. |
| Parent Menu | Select the parent menu. If you select a parent, the new menu will become a child of the parent menu selected. |
| Order Sequence | Numerical order in which the menu appears. Menus are place in ascending order. |
| Icon | Icon appended in front of the menu name. |
| Description | A simple description of the menu item for documentation purposes. |
| IsActive | This field is used to activate or deactivate the menu item. Yes means the menu is visible, No, the menu is not visible. |
| Page Link | This is the php page that is called when the menu item is clicked. All php pages are stored in the pages directory in the root folder of xCRUD Pro. |
Once a menu item is added and saved successfully, it is able to be viewed by a user with the given role.
# User role allocation
Login and navigate to the menu User/Staff
A list of all users will appear.
- Select edit on the user you wish to allocate the role.
- On the form that launches, click on the User Role tab.
- Then click Add User Role.
- A form to add the role will appear. The form has a list of all available roles.
- Save and Return.
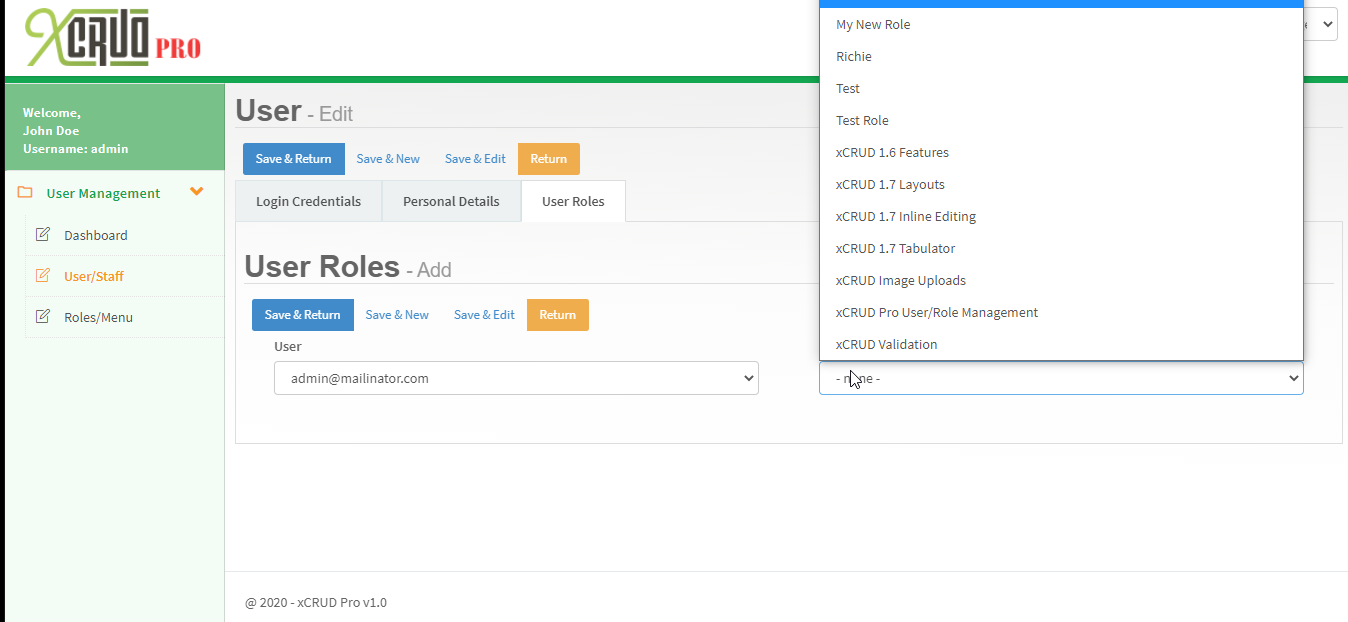
The user can now login, select the allocated role and proceed to the main page. The user will only see the menu items that belong to the allocated role.
# Form & Page Configuration
xCRUD Pro has a simple directory structure. The most important directories include
| - | - |
|---|---|
| /Pages | This directory contains all xCRUD pages that can be referenced by the menu |
| /lib | This directory contains the xCRUD 1.7 library and uploads folder where uploaded pictures are stored |
| /css | The theme css is located in this folder and can be altered to suit your need. |
INFO
All demo pages/forms that are currently in xCRUD 1.7 have been loaded in the pages/ directory of xCRUD Pro.
INFO
All forms apart from login and role select are basically xCRUD configurable pages.
# Migration of Existing Project
To migrate existing application ensure you do the following.
- Move all you xCRUD pages to the pages/ directory.
- Configure users and roles.
- Configure the menu items and point to your xCRUD pages.
- You're good to go.